Difference between revisions of "Hierarchy Editor"
(→Toolbar) |
(→Copy Existing Member) |
||
| (14 intermediate revisions by 5 users not shown) | |||
| Line 1: | Line 1: | ||
==Selecting Members== | ==Selecting Members== | ||
Double-clicking on a Grid's hierarchy label allows you to select the members using the Hierarchy Editor: | Double-clicking on a Grid's hierarchy label allows you to select the members using the Hierarchy Editor: | ||
| − | [[File:HierarchyEditorDialog.png| | + | [[File:HierarchyEditorDialog.png|400px|center]] |
The left of the dialog shows the hierarchy members. The tree can display either the members directly, or the members grouped by hierarchy level. The {{Menu|Show Levels}} toolbar button ([[File:MembersLevelsButton.png]]) can be used to switch between the two modes: | The left of the dialog shows the hierarchy members. The tree can display either the members directly, or the members grouped by hierarchy level. The {{Menu|Show Levels}} toolbar button ([[File:MembersLevelsButton.png]]) can be used to switch between the two modes: | ||
| Line 17: | Line 17: | ||
All members currently selected and that will show in the report appear on the right hand side. | All members currently selected and that will show in the report appear on the right hand side. | ||
| − | To create dynamic reports, you can also select members based on an Excel range or | + | To create dynamic reports, you can also select members based on an Excel range or FluenceXL slicer within the workbook. See the below articles for more details: |
*[[Driving Grids from an Excel Range]] | *[[Driving Grids from an Excel Range]] | ||
*[[Dimension Slicers]] | *[[Dimension Slicers]] | ||
| + | *[[Mdx:]] | ||
===Removing selections=== | ===Removing selections=== | ||
| Line 45: | Line 46: | ||
==Toolbar== | ==Toolbar== | ||
| − | [[File:HierarchyEditorToolbar.PNG]] | + | [[File:HierarchyEditorToolbar.PNG|400px]] |
'''Clear Selected Members''': Clear all currently selected members. | '''Clear Selected Members''': Clear all currently selected members. | ||
| Line 55: | Line 56: | ||
'''Show Levels''': Toggle between the member tree view and the level view. | '''Show Levels''': Toggle between the member tree view and the level view. | ||
| − | ''' | + | '''Advanced search''': See [[Set Searching]]. |
| − | ''' | + | '''Use Account Style Drilling''': Drilling a member opens its children above the parent. |
| − | ''' | + | '''Show Members in Hierarchy order''': Display the grid rows in hierarchy order. |
| − | ''' | + | '''Show Hierarchy Information''': Opens the [[Hierarchy Information]] dialog. |
| − | ''' | + | '''Refresh''': Refresh the list of available members. |
| + | |||
| + | '''Clear drills''': Clears any drills made on the grid. | ||
| − | ''' | + | '''Display Property''': Choose a property to be displayed on the grid. |
==Member Search== | ==Member Search== | ||
| Line 85: | Line 88: | ||
To display this selection as one row on the grid, go into the Hierarchy Editor and select More and then Group Members from the dropdown: | To display this selection as one row on the grid, go into the Hierarchy Editor and select More and then Group Members from the dropdown: | ||
| − | [[File:gm2.png| | + | [[File:gm2.png|650px|center]] |
The grid now displays one row for the three slicer choices. Give the slicer a title and it will display that instead of the XL3WithMember. | The grid now displays one row for the three slicer choices. Give the slicer a title and it will display that instead of the XL3WithMember. | ||
| Line 100: | Line 103: | ||
* [[MDX_formula_wizard|MDX Calculations]] | * [[MDX_formula_wizard|MDX Calculations]] | ||
| − | [[File:measurememselectorcalc.png| | + | [[File:measurememselectorcalc.png|650px|center]] |
| Line 107: | Line 110: | ||
New in v8.1 is the ability to copy existing current member selections in Member Selector. | New in v8.1 is the ability to copy existing current member selections in Member Selector. | ||
| − | + | Right click on the member and select copy. then right click within the selection box and click paste: | |
| − | [[File:CopyMember1.png| | + | [[File:CopyMember1.png|400px|center]] |
There are now two entries for United States: | There are now two entries for United States: | ||
| − | [[File:CopyMember2.png| | + | [[File:CopyMember2.png|400px|center]] |
This can be particularly useful in certain scenarios. For example, if you are creating a series of in cell charts that are highly-formatted you can format the first chart, copy the existing member selection and then update it to point to another member. This would mean all charts have identical formatting. | This can be particularly useful in certain scenarios. For example, if you are creating a series of in cell charts that are highly-formatted you can format the first chart, copy the existing member selection and then update it to point to another member. This would mean all charts have identical formatting. | ||
| − | Below is an in-cell chart for the United States. To create the same chart for another member, use | + | Below is an in-cell chart for the United States. To create the same chart for another member, use right click copy and paste to create another entry: |
| − | [[File:CopyMember3.png| | + | [[File:CopyMember3.png|400px|center]] |
Click the highlighted icon to change the member: | Click the highlighted icon to change the member: | ||
| − | [[File:CopyMember4.png| | + | [[File:CopyMember4.png|400px|center]] |
You can then pick another member by clicking the drop-down – alternatively you can point to an Excel range. | You can then pick another member by clicking the drop-down – alternatively you can point to an Excel range. | ||
| − | [[File:CopyMember5.png| | + | [[File:CopyMember5.png|400px|center]] |
Select the desired member – click OK and we can see we now have an entry for an in-cell chart for France as well as United States. | Select the desired member – click OK and we can see we now have an entry for an in-cell chart for France as well as United States. | ||
| − | [[File:CopyMember6.png| | + | [[File:CopyMember6.png|400px|center]] |
==Advanced Tab== | ==Advanced Tab== | ||
| Line 142: | Line 145: | ||
==See Also== | ==See Also== | ||
* [[Ranking, Sorting and Filtering]] | * [[Ranking, Sorting and Filtering]] | ||
| + | * [[Axis_set_editor_(Tuples)|Axis Selector]] | ||
[[Category:Grid Reporting]] | [[Category:Grid Reporting]] | ||
[[Category:OLAP Operations]] | [[Category:OLAP Operations]] | ||
Latest revision as of 15:21, 5 December 2023
Contents
[hide]Selecting Members
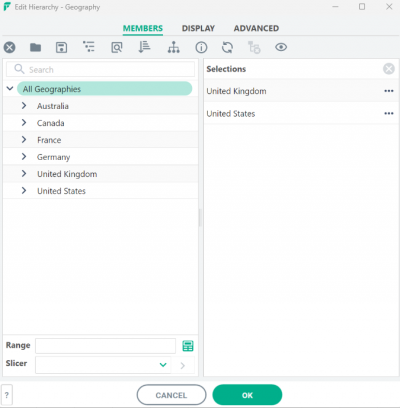
Double-clicking on a Grid's hierarchy label allows you to select the members using the Hierarchy Editor:
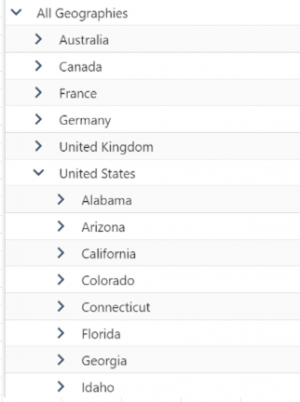
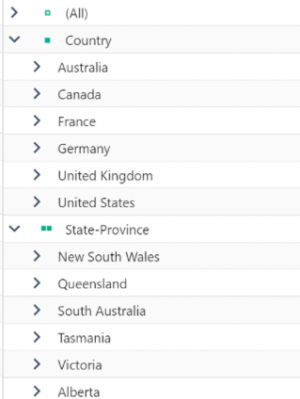
The left of the dialog shows the hierarchy members. The tree can display either the members directly, or the members grouped by hierarchy level. The Show Levels toolbar button (![]() ) can be used to switch between the two modes:
) can be used to switch between the two modes:
The tree can be expanded to its most detailed level where you can select values such as a specific name of a customer.
To select an item from the tree, either:
- Double click on the item
- Drag and drop the item into the right-hand selection area
All members currently selected and that will show in the report appear on the right hand side.
To create dynamic reports, you can also select members based on an Excel range or FluenceXL slicer within the workbook. See the below articles for more details:
Removing selections
To remove an item from the selection area, click on the delete icon at the end of the field. You can also reorder the selected items by dragging the hand icon.
You can clear all selections by using the Clear Selected Members toolbar button ().
Next to each selected member is a drop down icon.
Children: All direct children of the selected member will be inserted in to the report.
Descendants: All descendants will be inserted.
Lowest Descendants: Insert the lowest level descendants of the selected member.
Descendants at: Choose to display the descendants of the selected member at a particular level. For example, the descendants of 'Bikes' at Product level.
Next/Previous: This will select the current member and the next/previous members in the same level. This is particularly useful for date selections, such as the current month and previous 11 members. This value can also be driven from an excel range.
Toolbar
Clear Selected Members: Clear all currently selected members.
Load Member List: Load a saved member list.
Save Member List: Save the current member selections. This file can then be distributed and used in other grids/reports.
Show Levels: Toggle between the member tree view and the level view.
Advanced search: See Set Searching.
Use Account Style Drilling: Drilling a member opens its children above the parent.
Show Members in Hierarchy order: Display the grid rows in hierarchy order.
Show Hierarchy Information: Opens the Hierarchy Information dialog.
Refresh: Refresh the list of available members.
Clear drills: Clears any drills made on the grid.
Display Property: Choose a property to be displayed on the grid.
Member Search
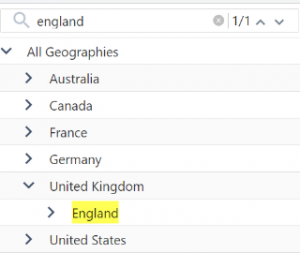
If you have a large hierarchy you can use the Search toolbar field to allow you to search all levels of the hierarchy:
The search will look down each branch of the tree and stop on the first member containing the search text. You can then navigate on to the next matching member using the navigation buttons.
If many members are return by the search text, it may be better to use the advanced search option which will display all matching members.
Having built a members list you can save it using the Save button. This can then be loaded into other reports.
Group Members in Member Selector
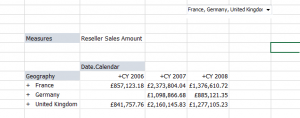
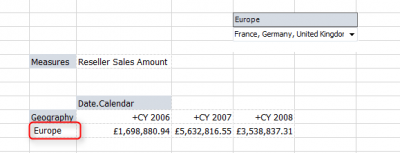
Members can be grouped in the Member Selector by right clicking on the member list (see Grid Calculations), or based on slicer choices or an Excel range. For example, below is a slicer with France, Germany and the United Kingdom selected:
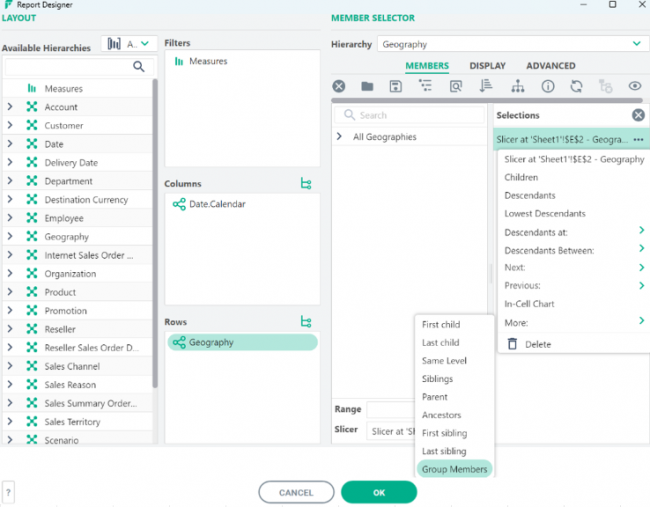
To display this selection as one row on the grid, go into the Hierarchy Editor and select More and then Group Members from the dropdown:
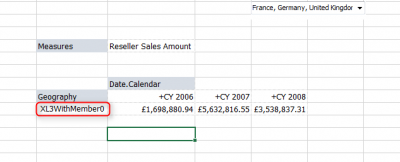
The grid now displays one row for the three slicer choices. Give the slicer a title and it will display that instead of the XL3WithMember.
|
|
Measure Calculations
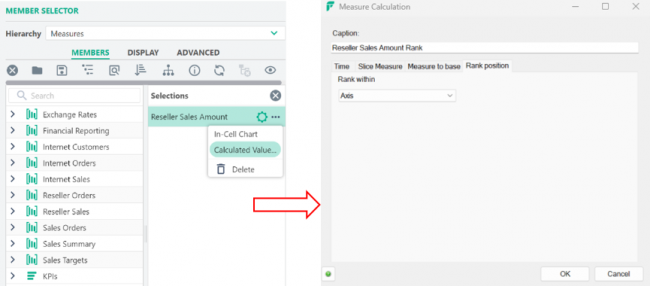
If you select a measure you get additional options in the member drop down which allow you to add
Copy Existing Member
New in v8.1 is the ability to copy existing current member selections in Member Selector.
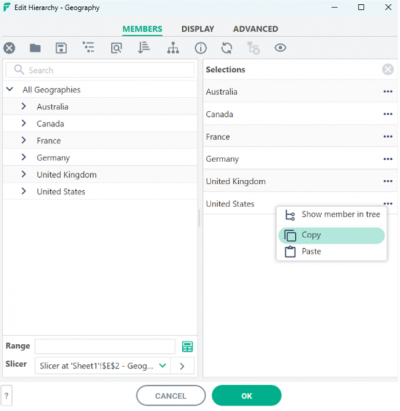
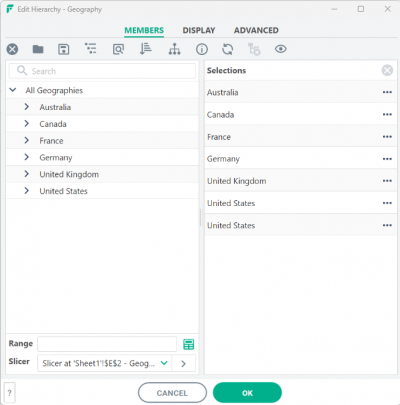
Right click on the member and select copy. then right click within the selection box and click paste:
There are now two entries for United States:
This can be particularly useful in certain scenarios. For example, if you are creating a series of in cell charts that are highly-formatted you can format the first chart, copy the existing member selection and then update it to point to another member. This would mean all charts have identical formatting.
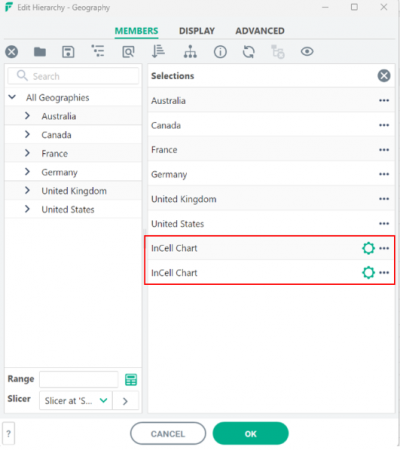
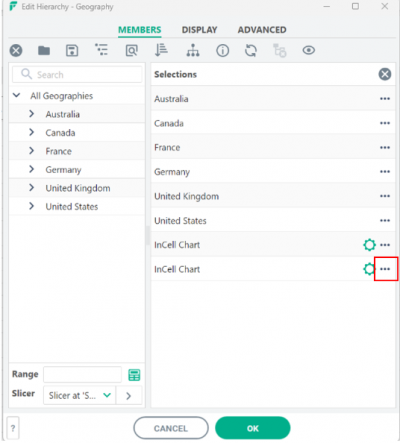
Below is an in-cell chart for the United States. To create the same chart for another member, use right click copy and paste to create another entry:
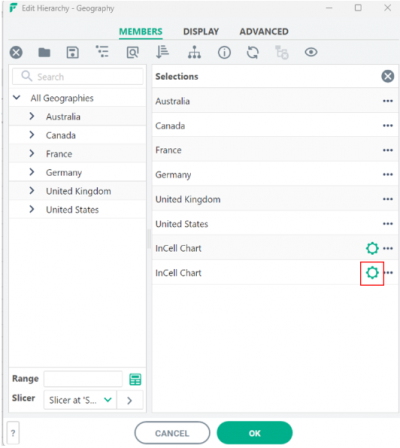
Click the highlighted icon to change the member:
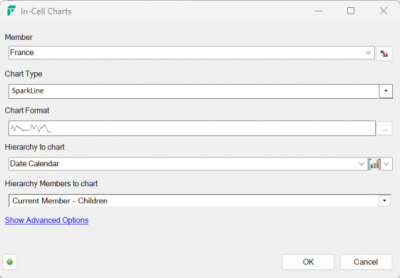
You can then pick another member by clicking the drop-down – alternatively you can point to an Excel range.
Select the desired member – click OK and we can see we now have an entry for an in-cell chart for France as well as United States.
Advanced Tab
You can make more advanced member selections from the advanced tab of the hierarchy editor. See Advanced Row and Column selections.
