SQL Repository/Version 8
|
|
This article refers to FluenceXL version 8. For other versions, see SQL Repository/Versions. |
From FluenceXL V8, FluenceXL Web Enterprise Edition can store its repository of published files in a database rather than on the server's file system. This method allows for finer grain control of various aspects of repository access, as well as a richer interface:
- new Excel-based dialogs for controlling permissions and access to reports and folders
- full version history of published items, as well as locking the live version
- logging of report accesses, including rendering times for usage and performance monitoring
- integration with any present domain and the ability to set up custom groups
- Extended options around integrating with existing "Forms Authentication" websites
- Operational reporting - report usage, user activity etc.
In addition to these features, the SQL Repository feature also enhances the following:
- scheduling: this is also accessible from Excel, and features an easier to use interface as well as integrated run history
- error logging: available from a dedicated server administration application, this can be used on any machine and user that has server access
Contents
[hide]Installation
- You must be running SQL Server 2008 or above, any edition is fine and it can be run on a different server to FluenceXLWeb without any changes to the setup process
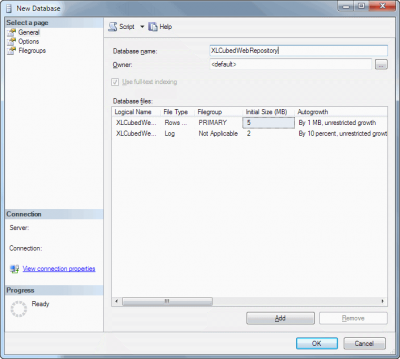
- Create a blank SQL Server database, and grant full access to it for the user doing the installation:
- Set the "Recovery Mode" to "Simple"
- On the FluenceXL Web Edition server, run the Configure FluenceXL Web Edition application
- Select the appropriate Web Edition instance (this will usually be done for you)
- Switch to the Sql Repository tab:

- Select the Use SQL for FluenceXL Repository box
- Enter the server and database names for the previously created blank database, and click Connect .
- The application will ask you if you want to populate the database. Click Yes :

- Check the Domain name and click the Load Domain Information button to load the users and groups from the domain, or see below for advanced options
- If desired, click the Import Repository button and enter the path to import an existing file system repository. Existing permissions will be transferred wherever possible but this should be verified once the system is available again as an initial test.
- Using SQL Server Management Studio, you should now add a Login for the FluenceXL application pool user (if the default FluenceXL application pool is used with the Application Pool Identity, then you can use IIS AppPool\FluenceXL as the Windows Authentication login name)
- On the User Mappings screen map that user to the XLCUBED_USER role
- If any users should be able to administer the repository (see below), map those users to the XLCUBED_ADMIN role
- If you need to restrict access to FluenceXLWeb:
- In the Configure FluenceXL Web Edition application, click the Administration button
- Select the Admin > System Settings menu item
- Select the group that should be allowed access to the Web Edition then click the Save toolbar button:

- Define which users will have "Root" folder access to create new folders and to manage permissions from in Excel, Select Admin > Folder Permissions:
 Select SYS Reports Root Folder - for the standard report publication area or the required item for connections, templates etc.


Scheduling
If Scheduling is desired, a few additional steps are required to use it with the SQL Repository.
- On SQL Server Management Studio's User Mappings screen, map the scheduling service user to the XLCUBED_SCHEDULER role
- In the Configure FluenceXL Web Edition application, click the Administration button, then select the Admin > System Settings menu item. Choose the Scheduling user from the list then click the Save toolbar button
- Select the Admin > Scheduling > SMTP Servers menu item and add the details of the SMTP server
- The ID and uniqueid columns will be filled in automatically
- To use an SSL connection, enter Y in the Use SSL column
- To allow the scheduler to use the server to send emails, enter Y in the Is Global column
- Select the Admin > Users or Admin > Groups menu item, and add the Can schedule reports and the Can edit schedule distribution groups where appropriate.
- Schedules must now be set up through the Excel Edition, select the FluenceXL ribbon > Publish to Web dropdown > Scheduling... ribbon button. Once you have connected to the server, you can then add new scheduled reports and manage existing ones
Running the Scheduler On Demand
From Version 9, the FluenceXL Scheduling Service Windows Service can be removed and the application can be run on demand, for example manually or by using Windows Task Scheduler, by using the RUNPENDING switch. For example, using the standard installation path:
C:\inetpub\wwwroot\FluenceXLWeb\Scheduler\FluenceXL.Scheduling.Service.exe /RUNPENDING
The command should be run using a user that has been set up as described above, i.e. with the necessary permissions and SQL roles.
Running it this way allows the use of the Scheduling feature even where multiple websites need to be set up on the same server. In this case, each website would have its own copy of the FluenceXL.Scheduling.Service.exe and its own SQL repository, so each could have a scheduled task set up to run its pending schedules.
Administration
There are two applications that can be used to administer the SQL repository:
- Configure FluenceXL Web Edition (included in the FluenceXL Web Edition setup, and installed on the server's start menu)
- Administer FluenceXL Web Edition Repository (optionally installed separately on any machine)
Either of these will allow you to:
- Administer users, including giving them access to the FluenceXL Web application, allow and deny them access to the repository, their personal folders, scheduling and scheduling distribution groups
- Administer custom groups, including adding and removing users. You may also designate a group for FluenceXL web access, as mentioned above
- Control folder access and permissions
- Control startup reports for users and groups
- Manage SMTP servers for scheduling
- View logs
Using Domain Users and Groups
In order to use users and groups from your Domain, run the Configure FluenceXL Web Edition application, then select the Sql Repository tab. By default, the Domain box will automatically be populated with the name of the local Domain, but it supports several formats:
- Domain name
- e.g. example.com
- Load all the users and groups in the given domain
- Localhost
- Load all the users and groups from the host machine
- A semi-colon delimited list of LDAP queries
- e.g. LDAP://OU=Development,DC=somecom,DC=com; LDAP://OU=Consultants,DC=somecom,DC=com
- Allows you to load users and groups from the domain, but limit the import to the given Organisation Units, etc.
- A semi-colon delimited list of global catalog queries
- e.g. GC://OU=Development,DC=somecom,DC=com; GC://OU=Consultants,DC=somecom,DC=com
- If your domain supports it, this may be faster than the corresponding LDAP queries
- Group filtering, for example
- e.g. LDAP://DC=somecom,DC=com~(cn=group)
- When using LDAP or GC queries, you may also filter the groups returned by using this form, where group can be a full group name or a wildcard (e.g. Sales*)
Automatically keeping the Domain information up to date
Once this has been configured, the FluenceXL Scheduling Service can be used to keep the Domain information up to date on a regular basis. To set this:
- Run the Configure FluenceXL Web Edition application
- Select the Scheduling tab
- Select the Schedule domain update box, and enter how frequently you would like to update the Domain information
- The update will occur at midnight, server time
Note that the FluenceXL Scheduling Service must be set up correctly in order for this to succeed.
Manually running the Domain import process
From FluenceXL v8.1.39, the Scheduling Service domain import process can be triggered manually by passing an extra command line parameter:
C:\inetpub\wwwroot\FluenceXLWeb\Scheduler\FluenceXL.Scheduling.Service.exe /UPDATEDOMAIN
This allows it to be called manually or via an automated process, for example Task Scheduler. The user running the process must be a member of the XLCUBED_ADMIN role.
Viewing the Domain import logs
In order to see the progress of an individual Domain import, or whether errors occurred on a previous occasion, run the Configure FluenceXL Web Edition application, then select the Sql Repository tab. Click on the Administration button, then select the Admin > Logs > Active Directory menu.
Operational Reporting
The installation provides an operational reporting dashboard as shown below:

The Excel file can be accessed through the "FluenceXL Administration Reports" start menu shortcut, or directly in the \Reports folder within the FluenceXL Web Website. Additional operational reports can be built using the oData datasource provided with FluenceXL Web (accessed through Grids & Tables - Other Sources).
The report will run against the last FluenceXLWeb server connected to in the "Publishing" screen.
You can enable at a group or user level who has access to these reports:

Import and Export of Reports
Moving reports between repositories is no longer a case of copying files between file system folders. In order to provide a mechanism for this, FluenceXL Excel Edition has two menu items, which can be found on the FluenceXL Ribbon > Extras menu:

Note that these options will only be available to users who have the Can bulk import and export reports permission configured, as described above.
Exporting Items
When you select the FluenceXL Ribbon > Extras > Export Items from Web... menu item, the Export Items form appears. Once you connect to the web server, the list of folders and reports available to you appears in the form:

Select any items that need to be exported and click OK to save the folders and files as a repository archive file.
Importing Items
When you select the FluenceXL Ribbon > Extras > Import Items into Web... menu item, the Import Items form appears. Connect to the web server, then select the repository archive file created above. The selected items are imported into the repository in the same folder location they were exported from, but on the current web server.