Freeform Report
From version 2308.1 FluenceXL supports Freeform reports.
A Freeform report is an hybrid query object that combines the flexibility of cell based reporting (similarly to FluenceXl formulas) with the performance of grids. It is natively available for any type of dimensional data source as well as for relational ones, using a Pivot View.
Contents
[hide]Inserting a Freeform report
From a grid
The recommended way to create a Freeform report is to convert an existing grid from the right click menu:
From Excel cells
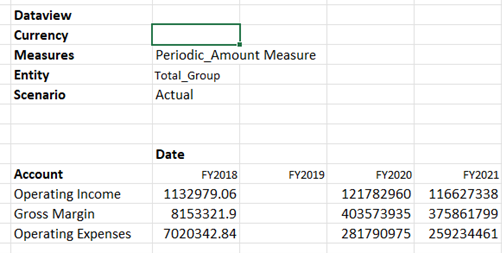
A Freeform report can also be directly inserted from the Excel sheet by letting FluenceXL analyse the surrounding ranges of any cell located in the projected data area.
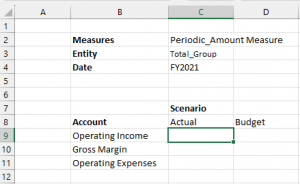
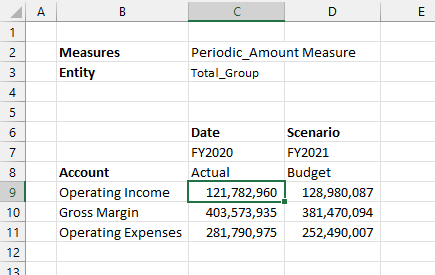
This approach requires complying with a strict layout:
- The dimension to use for the columns (here “Scenario”) must vertically align with the top left data cell (C9)
- The dimension to use for the rows (here “Account”) must be added right above the first row header, on the same rows as the innermost columns headers
- The dimensions to use as filters (here “Measures”, “Entity”, and “Date”) must vertically align with the outermost row dimension (here “Account”), 3 rows above the column dimensions
- All member names must be text, not numbers. If you have numeric names you must porefix them with an apostrophe (').
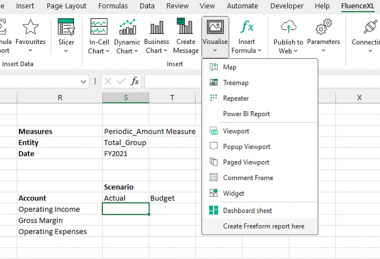
Once this layout is properly setup, select any cell from the data area and click “Create Freeform report here” from the “Visualise” menu:
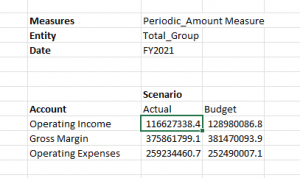
This will create a Freeform report and populate the data cells accordingly:
Removing a Freeform report
Make sure you never delete the top left data cell as it holds the location of the Freeform report. Doing so will not remove the Freeform report from the Excel sheet.
Use “Remove Freeform report” from the right click menu instead to delete a Freeform report. This removes the report definition and leaves the cells as plain data values.
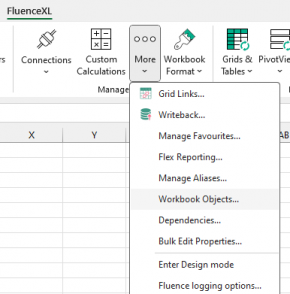
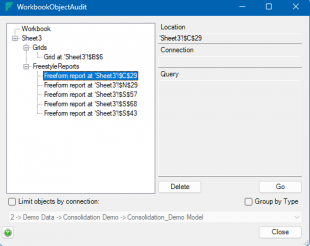
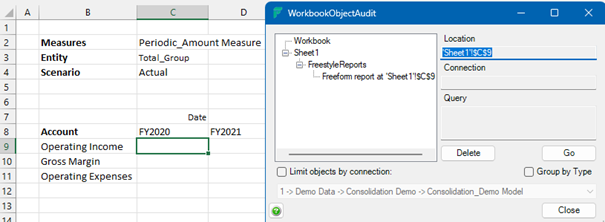
Alternatively, you can use “Workbook objects” in the “More...” menu of the FluenceXL ribbon to locate or delete any Freeform report in the current workbook:
Updating existing members
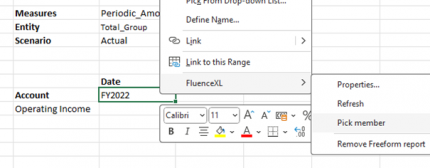
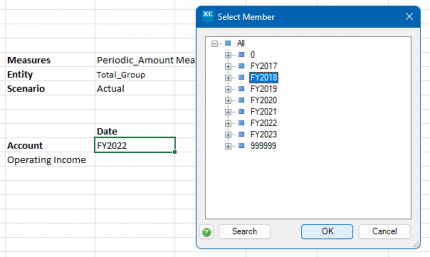
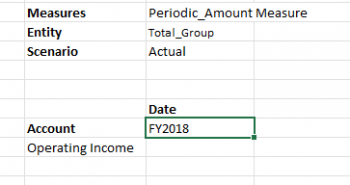
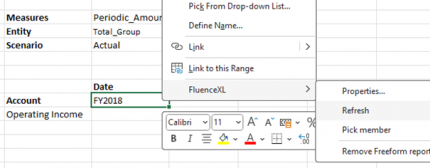
Existing members in rows, columns or filters can be directly overtyped on the sheet or alternatively be selected from the “Select Member” dialog that can be displayed from the “FluenceXL\Pick member” right click menu:
Note that using the member picker will not trigger the refresh of the data.
Refreshing a Freeform report
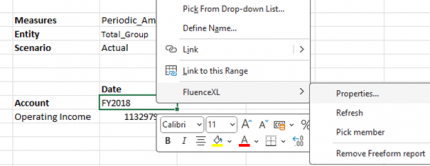
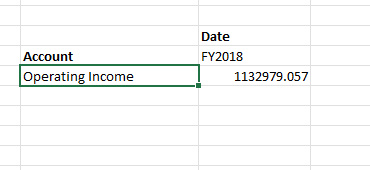
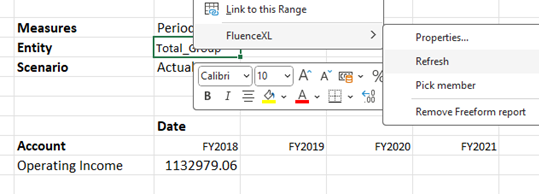
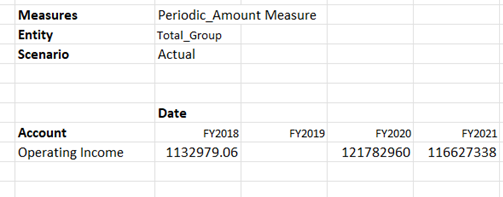
When existing members in rows, columns or filters have been changed, select “FluenceXL\Refresh” from the right click menu or press CTRL+SHIFT+R to trigger the refresh of the data area.
Freeform properties
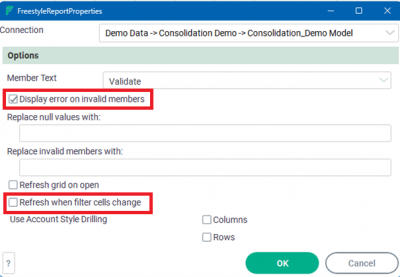
Note that you can force the data cells to automatically refresh whenever a filter member is changed by ticking “Refresh when filter cells change” in the Freeform properties dialog. This can be displayed from the “FluenceXL\Properties” menu item.
Also note that we recommend leaving the “Display error on invalid members” box ticked In. If this box is unticked unknown members will have their data cleared which could lead to data being inadvertently missed.
Adding columns and rows
Expand /Collapse
If a hierarchy is used in rows or in columns, it can be expanded and collapsed the same way as with FluenceXL grids: double-clicking a member will display its children, double-click again will collapse them.
Note that expanding / collapsing a member requires member names to be typed in as text. If a member name is considered a number by Excel (e.g. 2023), you should add a quote as a suffix to turn it to text (e.g. ‘2023) so that it can be expanded / collapsed.
Also note that unlike grids, FluenceXL will insert and delete cells as required which might offset other cells located below or on the right of the Freform report.
Adding columns or rows
Extra columns and rows can be added right after existing ones. Make sure you leave no gaps between existing and new members.
Once additional members have been added, make sure you select an existing cell - rather than a newly inserted one - to trigger the refresh.
Inserting Excel calculations
By default, FluenceXL will display an error message when a row or column header does not match a valid member label or ID of the data source.
However, if an Excel formula is typed in the first data cell of the associated row/column of the unknown member, FluenceXL will copy the formula throughout the entire row/column upon refresh.
Changing the layout of Freeform report
The easiest way to change the layout of a Freeform report is to set up the desired layout in a grid then to convert it to a Freeform report.
If you prefer to manage the layout directly from the Excel sheet, make sure you don’t modify the location (top left data cell) of the Freeform report.
In the following examples, the location of the Freeform report is C9 (top left data cell).
Adding a column dimension
The example below shows an incorrect layout: the original top left data cell has changed from C9 to C10. C9 is not a data cell anymore.
The example below shows the correct layout: C9 is still the top left data cell.
Adding a row dimension
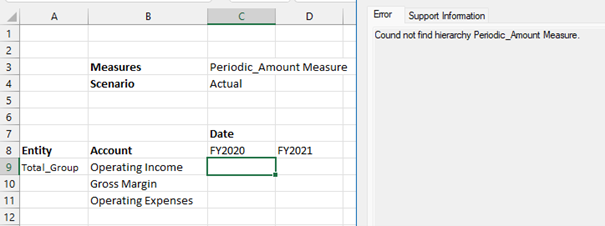
The example below shows an incorrect layout: the original top left data cell has changed from C9 to D9. C9 is not a data cell anymore.
The example below also shows another incorrect layout: C9 is still a data cell but the filter dimensions are not aligned with the outermost row dimension.
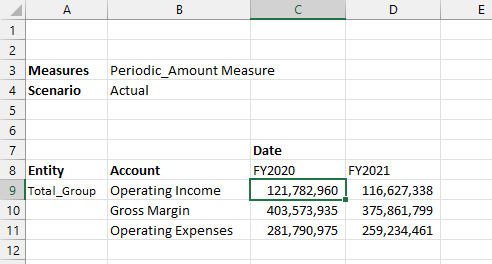
The example below shows the correct layout.
Adding a filter dimensions
Make sure you add any additional filter dimension right above existing ones.
Note that if no member is specified for a filter dimension the dimension will simply be ignored (the data will not change).


